Purge the audit log
You can improve the performance of Vernon CMS by purging the audit log.
Overview
The audit log tracks data changes in your system. You can use it to report on and undo data changes. The stored data will build up, which can slow down Vernon CMS. You can purge the audit log but keep a reasonable amount of data so you can undo changes if necessary.
Schedule the purging of the audit log on a fortnightly, monthly, or quarterly basis depending on how heavily you use the system.
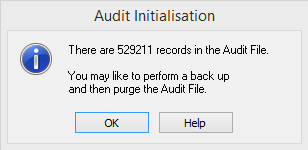
You should also purge the audit log if you receive the following message when you log in:

It's best to purge the audit log when few people are using the system, as purging can slow the system down.
Before you begin
Before purging the audit log, you should archive a copy of the LOGS folder. This will allow you to review transaction records and perform system rollbacks even after the audit log has been purged. This can be part of your regular backup schedule.
-
Go to the Wincoll folder and then the DATA folder.
-
Copy the LOGS folder to an external storage device.
-
Rename the folder with the date.
Steps
-
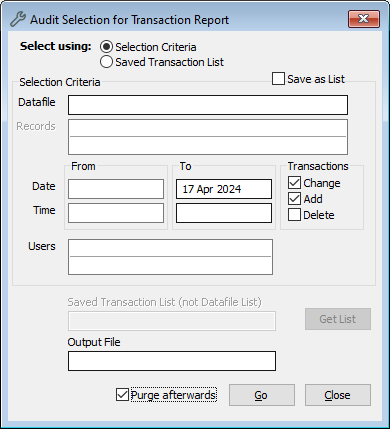
Go to the Tools menu, then System Maintenance, then Audit, then click Transaction Report.
-
Leave the Datafile field blank to purge all files in the system.
-
Leave the From Date field blank to purge all transactions before the To Date.
-
In the To Date field, enter a date six months before today. It's important to retain enough data to perform rollbacks or restore lost data, should the need arise.
-
Select the transactions to remove (Change, Add, Delete).
-
Optional: In the Output File field, specify a filename and location to save a report of all the transaction records that have been purged.
-
Select Purge Afterwards.

-
Click Go.
-
When you perform the purge, the transaction report will appear in a preview window. You can save the report of all purged records.
-
Click Yes to purge the audit log when prompted.
