Set up Web Messenger for Vernon Browser
Learn how to set up Web Messenger to send updates to your records on Vernon Browser.
Step 1: Get the Related Record ID of your Browser export report
You'll need to enter the Related Record ID of your Browser export report in your Web Messenger configuration.
-
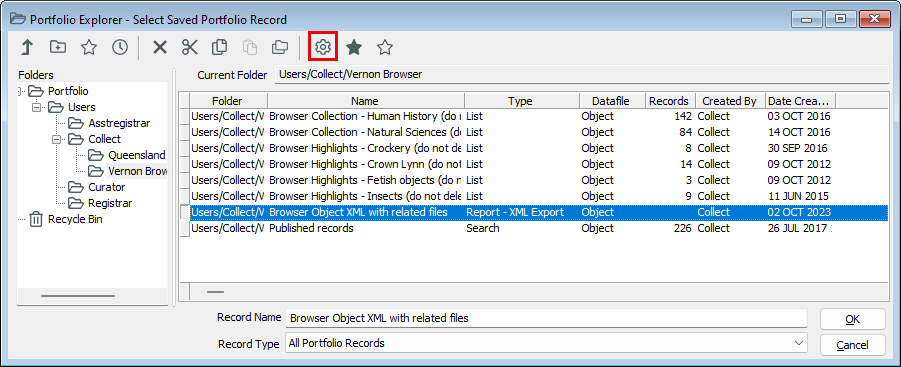
Open Portfolio and find the Browser export report.
-
Select the report and click Properties.
-
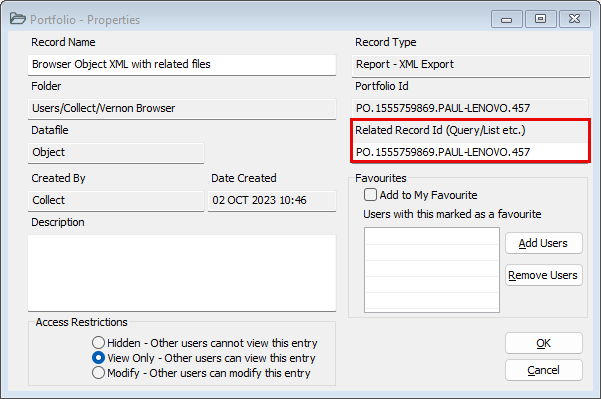
In the Related Record Id field, select and copy the ID.
Step 2: Open Web Messenger and set up the configuration
Go to the Tools menu, then Public Access, then click Web Messenger, then click Configuration.
-
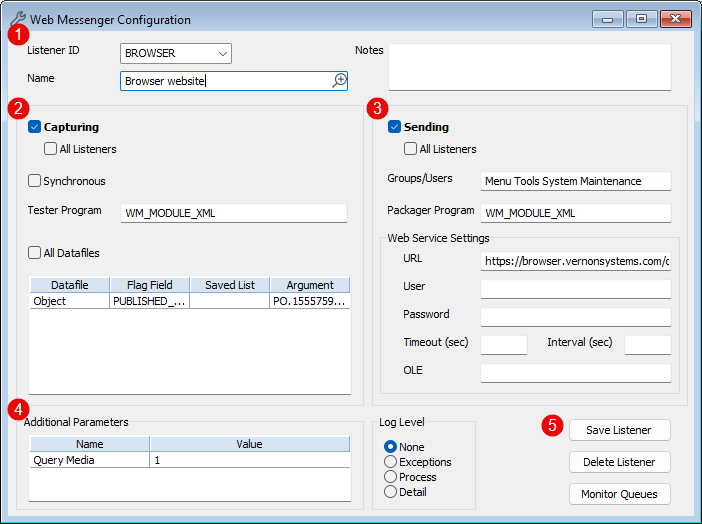
Enter the listener details:
-
Listener ID: BROWSER
-
Name: Browser website
-
-
Enter the capturing details:
-
Capturing: Ticked.
-
Tester Program: WM_MODULE_XML
-
Datafile: Object
-
Flag Field: PUBLISHED_COLLECTION
-
Argument: Paste the Related Record ID of the Browser export report that you copied earlier.
-
-
Enter the sending details:
-
Sending: Ticked.
-
Groups/Users: Menu Tools System Maintenance
-
Packager Program: WM_MODULE_XML
-
Web Service Settings:
-
URL: Enter the site’s URL and add /opac-rest on the end (for example, https://browser.vernonsystems.com/opac-rest).
-
User: Enter the user we gave you.
-
Password: Enter the password we gave you.
-
-
-
Enter two additional parameters:
-
Name: Basic Authentication
No value is required. -
Name: Query Media
Value: 1
This parameter will check if images already exist on the destination server.
-
-
Set the Log Level to Exceptions.
-
Click Save Listener.
Step 3: Test that the configuration is working
You can edit and save a public Object record to test that the configuration is working. When you come back to Web Messenger Monitor after editing and saving record, the queue length will have increased by 1.
Clicking on Flush forces the update immediately (otherwise the queue will be processed when your computer is idle for a couple of minutes).
For more information, see Monitor your Web Messenger queues and send servers.
Step 4: Manually update all your records on Browser
Once you know it's working correctly, it's worth refreshing all the records you have online. Make a list of all Object records marked for publishing and then manually flush the list through Web Messenger.
-
Do an Advanced Search on the Object file, searching on the Update History field for everything from a few days before the last manual import.
-
Refine the results by searching on the Published Collection field for Online, or whatever your term for your online collection is.
-
Save these records as a list. See Save a list.
-
Flush this list through Web Messenger. See Push updates manually through Web Messenger.