Record your location data offline and import it
You can record location information while working offline with the Offline Location Recording spreadsheet.
Overview
When you don't have access to Vernon CMS from your computer, you can use an Excel spreadsheet to record location information. You can then import your changes with the Batch Location Change tool.
There are five steps to this process:
-
Export your location and object data from Vernon CMS.
-
Open the spreadsheet and import the location and object data.
-
Record the new location information in the spreadsheet.
-
Export the data from the spreadsheet.
-
Import the data into Vernon CMS.
Note: You can only update the location for a whole object, not its parts.
Before you begin
If you are working with a specific group of Object records, save them as a list first. See Save a list.
Don't worry if you don't know which objects you need to work with at the offline location. You can enter the objects' accession numbers into the spreadsheet as you go.
Step 1: Export your location and object data from Vernon CMS
-
Go to the Tools menu, then Location Functions, then click Export Locations for Off-Line Work.
-
Optional: To export a list of Object records:
-
Go to the Tools menu, then Location Functions, then click Export Objects for Off-Line Work.
-
List Manager will open. Click Portfolio on the toolbar to select a list then click OK.
-
Click OK.
-
Step 2: Open the spreadsheet and import the location and object data
-
In File Explorer, open the Wincoll > DATA > BATCHLOC folder and open the batchloc.xls spreadsheet in Excel.
-
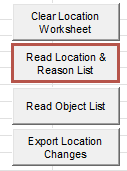
In the spreadsheet, click the Read Location and Reason List button to import the locations to the Location Name and Location Reason columns.
-
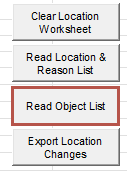
Optional: If you exported a list of objects, click the Read Object List button to import the object data into the Object ID, Accession No, Object Details, and Old Location columns.
-
Save the batchloc.xls spreadsheet.
-
Copy the batchloc.xls spreadsheet to the computer you will use. For example, copy the spreadsheet from your desktop computer to a USB drive. Then copy the spreadsheet from the USB drive to your laptop.
Step 3: Record the new location information in the spreadsheet
-
Working offline, open the batchloc.xls spreadsheet.
-
In the Date field and Time field, click to enter a default date and time, or type in another date and time.
-
In Location Reason, select a term from the list. If some objects need different reasons, you can enter them when data is imported back into Vernon CMS.
-
Enter your location data:
-
If you didn't import your object data into the spreadsheet, then in the Accession No column, enter an object's accession number and press Enter.
-
Next to each object, in the Found at Old Location column, enter Yes or No. You can either select the options or type y or n into the cell. If you have not imported objects into your spreadsheet, the only option is No.
-
If you enter Yes, the current location for the object will default into the Current Location field.
-
If you enter No, the Current Location field will remain blank.
-
-
For objects that are not found at their old location, in the Current Location field, select the location from the list.
-
-
Optional: In the Date and Time columns, enter a specific date and time.
-
Save the batchloc.xls spreadsheet.
Step 4: Export the data from the spreadsheet
-
Copy the batchloc.xls spreadsheet back to a computer with access to Vernon CMS. Paste it in the Wincoll > DATA > BATCHLOC folder and overwrite the original file.
-
Open the updated batchloc.xls spreadsheet from the BATCHLOC folder.
-
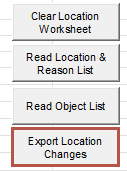
Click the Export Location Changes button on the spreadsheet. This will create a MOVE.EXP file in the BATCHLOC folder.
Step 5: Import the data into Vernon CMS
-
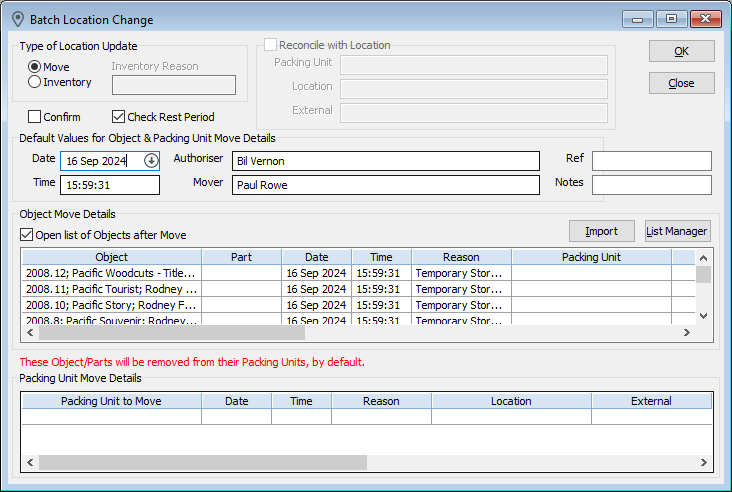
In Vernon CMS, go to the Tools menu, then Location Functions, then click Batch Location Change.
-
Under Type of Location Update, select Move or Inventory.
-
Click Import, then in File Explorer, go to the Wincoll > DATA > BATCHLOC folder, select the MOVE.EXP file and click Open.
-
The data will appear in the Object Move Details table. Check the details in the Object table. If the default Location Reason is not suitable for some records, scroll through the table and update the reason for individual objects.
-
Click OK to update the records.