Create a user view perspective
Learn about user view perspectives and how to create them.
Overview
You can choose an authority field that changes the user view depending on the authority term.
Let's say you've created a Registrarial user view for the Object file, but want to display different fields depending on the Department. You could create a perspective with the Department as the controlling field.
-
When the Department is Natural Science, the user view will display fields that are useful for Natural Science objects.
-
When the Department is Social History, the user view will display fields that are useful for Social History objects.
The Department field is the most commonly used field to control user views, but you could also use Classification, Procedural Status or other fields. For example when a user view is controlled by Procedural Status, you may create differing perspectives for Considered Items, Accessioned Items and Deaccessioned Items.
Steps
-
Go to Tools menu > System Maintenance > User Defined Parameters > User View Configuration.
-
In View Name, enter a name.
-
In for File, enter the file. For example, Object.
-
In Perspectives controlled by, enter the authority field or click Options to select it. For example, Department. The perspective fields will display.
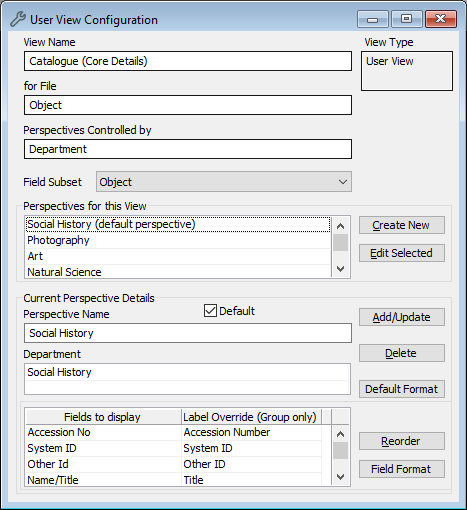
-
In the Perspectives for this View area, click Create New.
-
In the Current Perspective Details area, in Perspective Name, enter a name. For example, Archives.
-
In the field below, which is now named after the authority field (for example, Department), enter the authority terms. For example, enter Archives.
-
In Fields to display, enter the fields you want in the User View, or click Options to select fields.
-
Click Add/Update to add this perspective to the Perspectives for this View table.
-
Select or create additional perspectives as required.
-
Click Save.